You are browsing the docs for the snapshot version of Nexus, the latest release is available here
Studio
A Studio is a collection of persistent queries organized in a table layout for users to quickly access relevant data in a customizable way. Studio authors can create a studio to match a specific topic, and create organization schemes called Workspaces and Dashboards to access various aspects of that data.
Want to configure a studio straightaway?
For example, a Studio might cover all datasets from the Neocortex, with a Workspace called Physiology and a Dashboard called Morphology Pipeline.
In essence, a Studio is a UI layer that performs queries according to a configuration that lives in a Nexus instance as a Resource. It has a label for a meaningful title and a description field to convey to the users what sort of data they can expect to find there. Most importantly, a Studio configuration has a Workspace collection.
{
  "@context": "https://bluebrainnexus.io/studio/context",
  "@type": "https://bluebrainnexus.io/studio/vocabulary/Studio",
  "description": "",
  "label": "test",
  "workspaces": [
    "https://nexussandbox.io/org/project/3bdf8b08-7b9a-443b-b04d-be2a048893ba"
  ]
}
A Studio will be given a URI for navigation or sharing.
About the Studio Context
In order for the Studio to work as intended with the UI, a context must be in the project. Its purpose is to direct the Knowledge Graph to understand how studio-specific properties behave, such as that Workspaces should be set (an unordered collection without duplicates).
If you create a Studio using the UI in Nexus Fusion, this resource will be created for you, if it doesn’t exist already. If you plan on bootstrapping your own projects programmatically, such as through the API, then you might need to take care to include it.
Every Studio resource that is created should reference this context resource as the @context property. For an example, see the Studio resource mentioned above. The default Studio context @id for all our examples will be https://bluebrainnexus.io/studio/context, and it is what Nexus Fusion will use.
Here’s what the context should look like:
"{
  "@context": [
    {
      "@base": "https://bluebrainnexus.io/studio/",
      "@vocab": "https://bluebrainnexus.io/studio/vocabulary/",
      "label": {
        "@id": "http://www.w3.org/2000/01/rdf-schema#label"
      },
      "name": {
        "@id": "http://schema.org/name"
      },
      "description": {
        "@id": "http://schema.org/description"
      },
      "workspaces": {
        "@id": "https://bluebrainnexus.io/studio/vocabulary/workspaces",
        "@container": "@set",
        "@type": "@id"
      },
      "plugins": {
        "@id": "https://bluebrainnexus.io/studio/vocabulary/plugins",
        "@container": "@set"
      },
      "dashboards": {
        "@container": "@set"
      },
      "dashboard": {
        "@id": "https://bluebrainnexus.io/studio/vocabulary/dashboard",
        "@type": "@id"
      },
      "view": {
        "@id": "https://bluebrainnexus.io/studio/vocabulary/view",
        "@type": "@id"
      }
    }
  ],
  "@id": "https://bluebrainnexus.io/studio/context"
}"
Workspaces
A workspace is a collection of Dashboards paired with a View. You can have any number of Dashboard-View pairings organized into a Workspace. You can label a Workspace and add a description to help users understand what kind of content they can expect to find there.
{
  "@context": "https://bluebrainnexus.io/studio/context",
  "@type": "StudioWorkspace",
  "dashboards": [
    {
      "dashboard": "https://bbp.epfl.ch/neurosciencegraph/data/8751df37-a75f-4858-b174-742264deb4e9",
      "view": "nxv:defaultSparqlIndex"
    },
    {
      "dashboard": "https://bbp.epfl.ch/neurosciencegraph/data/99982da8-ec3a-4f18-9388-a0cc81bfff0c",
      "view": "nxv:defaultSparqlIndex"
    }
  ],
  "description": "",
  "label": "MorphoTester"
}
Dashboards
A Dashboard is simply a query with a description and a label. This will be used by the Workspace to query against the view paired with it inside the Workspace configuration. This way, you can write one query, and re-use it against multiple potential views.
An example Dashboard resource looks like this:
{
  "@context": "https://bluebrainnexus.io/studio/context",
  "@type": "StudioDashboard",
  "dataQuery": "prefix nxv: <https://bluebrain.github.io/nexus/vocabulary/>\nprefix s: <http://schema.org/>\nSELECT DISTINCT ?self ?familyName ?givenName\nWHERE {\n?s nxv:constrainedBy <https://neuroshapes.org/dash/person> ;\n  nxv:self ?self ;\n  s:familyName ?familyName ; \n  s:givenName ?givenName\n}\nLIMIT 20",
  "description": "A list of every scientist",
  "label": "Scientists",
  "plugins": ["nexus-plugin-example"]
}
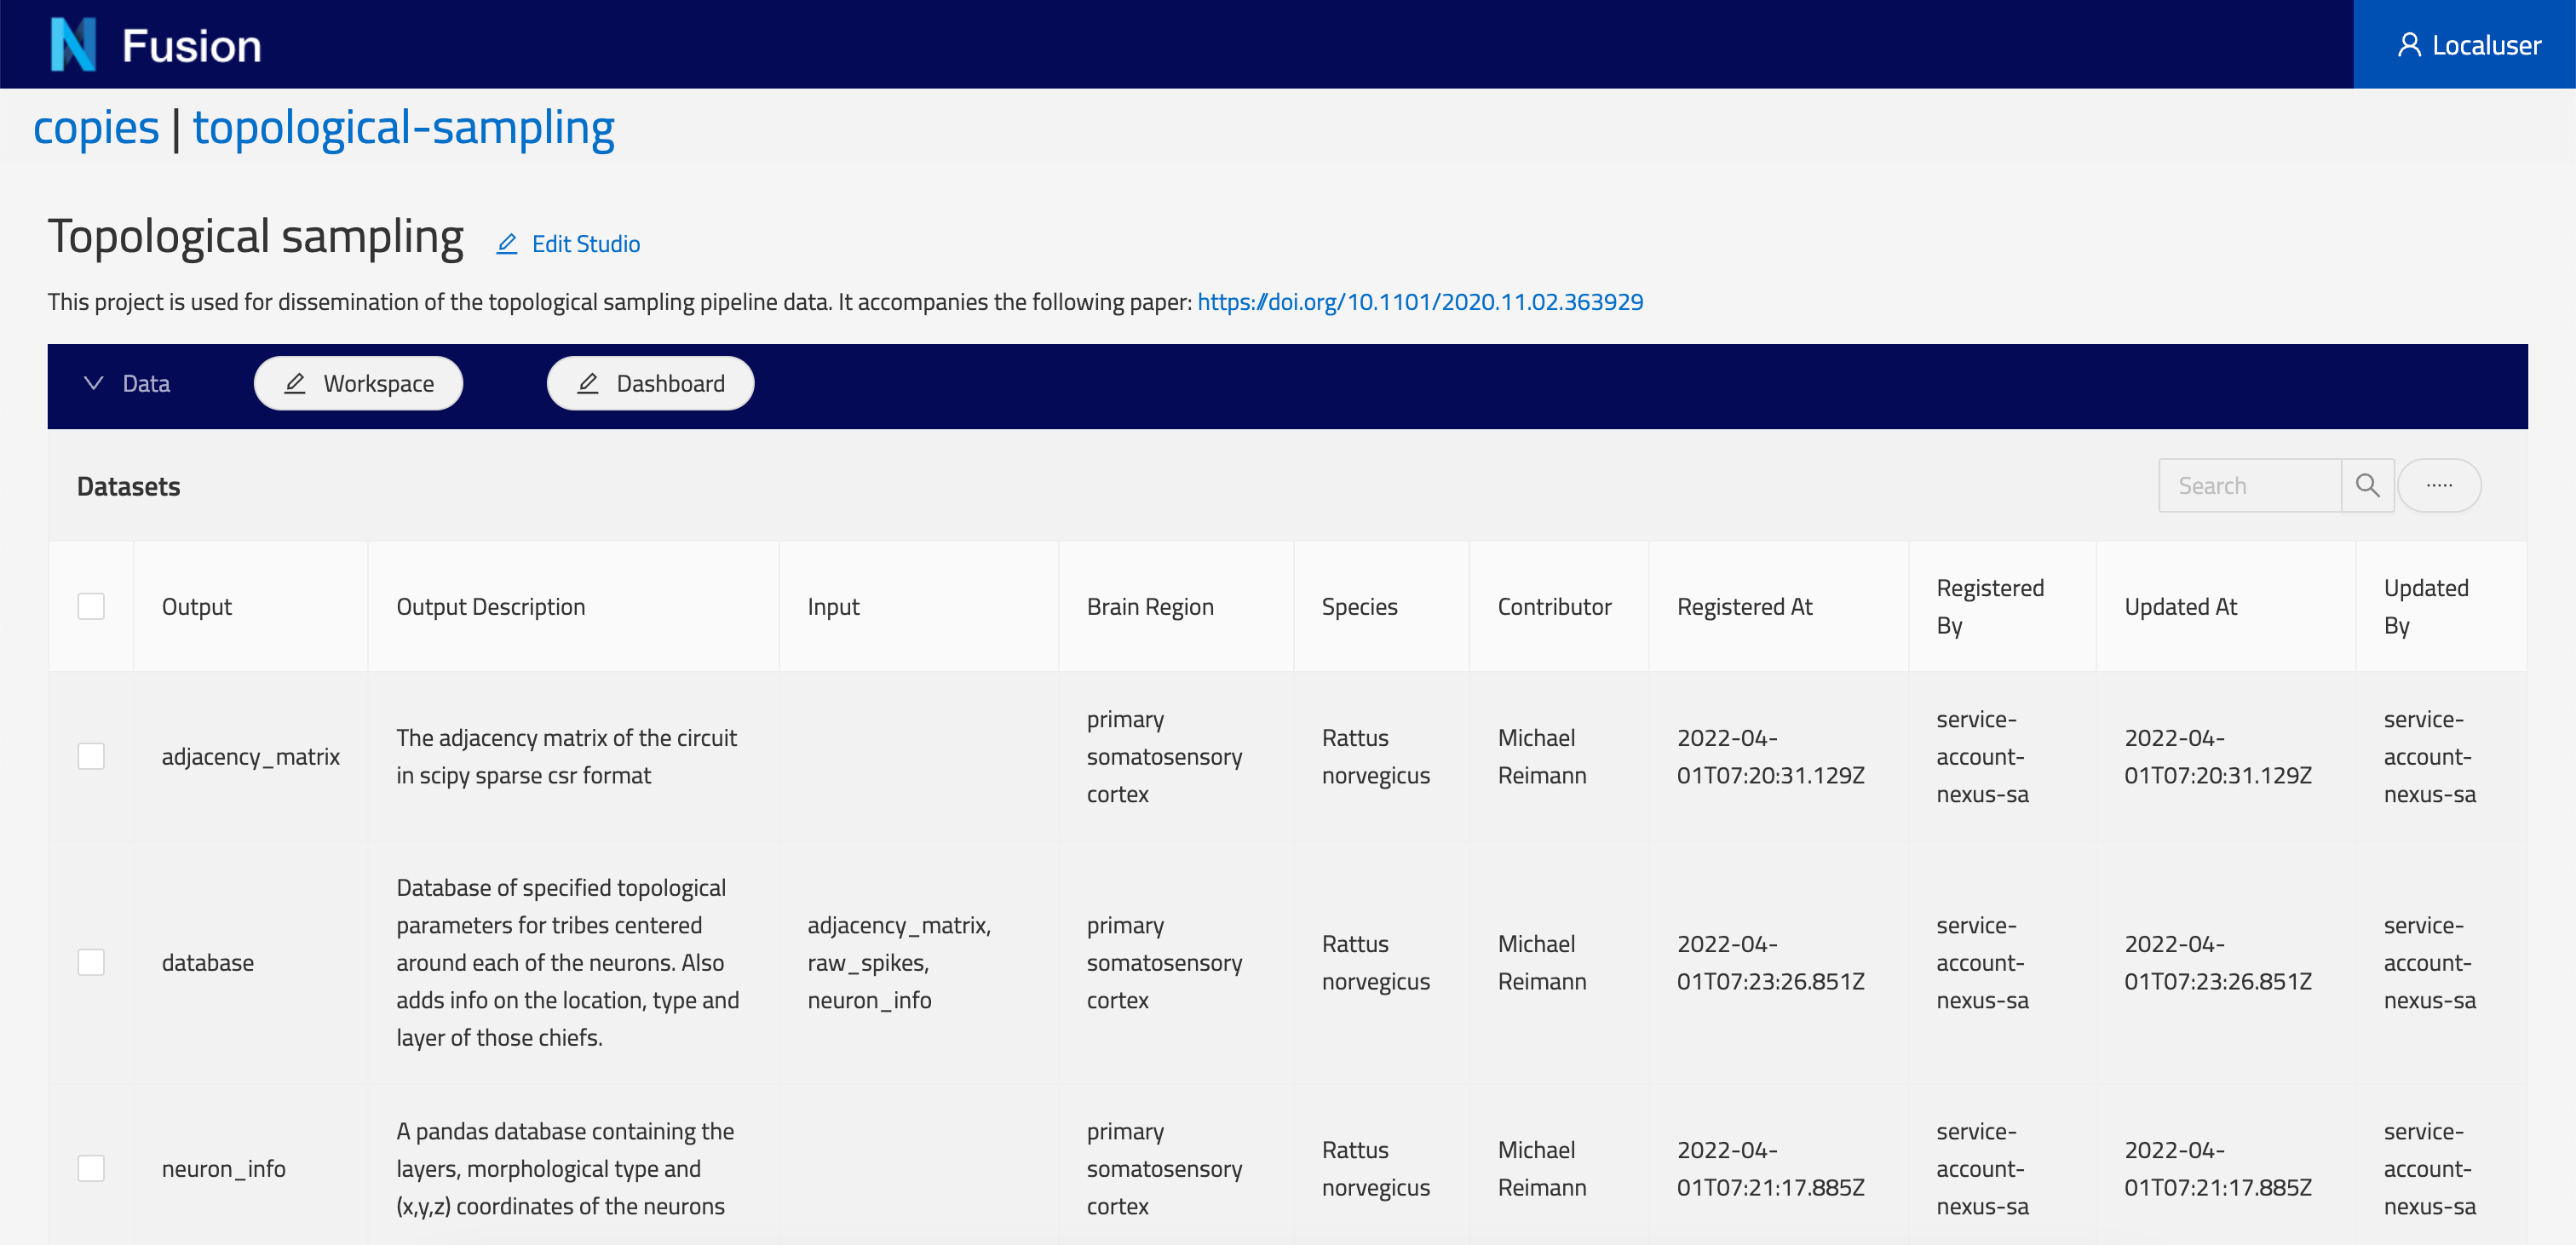
The Dashboard, once configured, will present the results of your SPARQL query in a table. Each item in the row will be clickable and lead to a details page showing the Resource, in this case, a list of scientists that have contributed data to the project.
How to Configure a Studio
Studio Creation
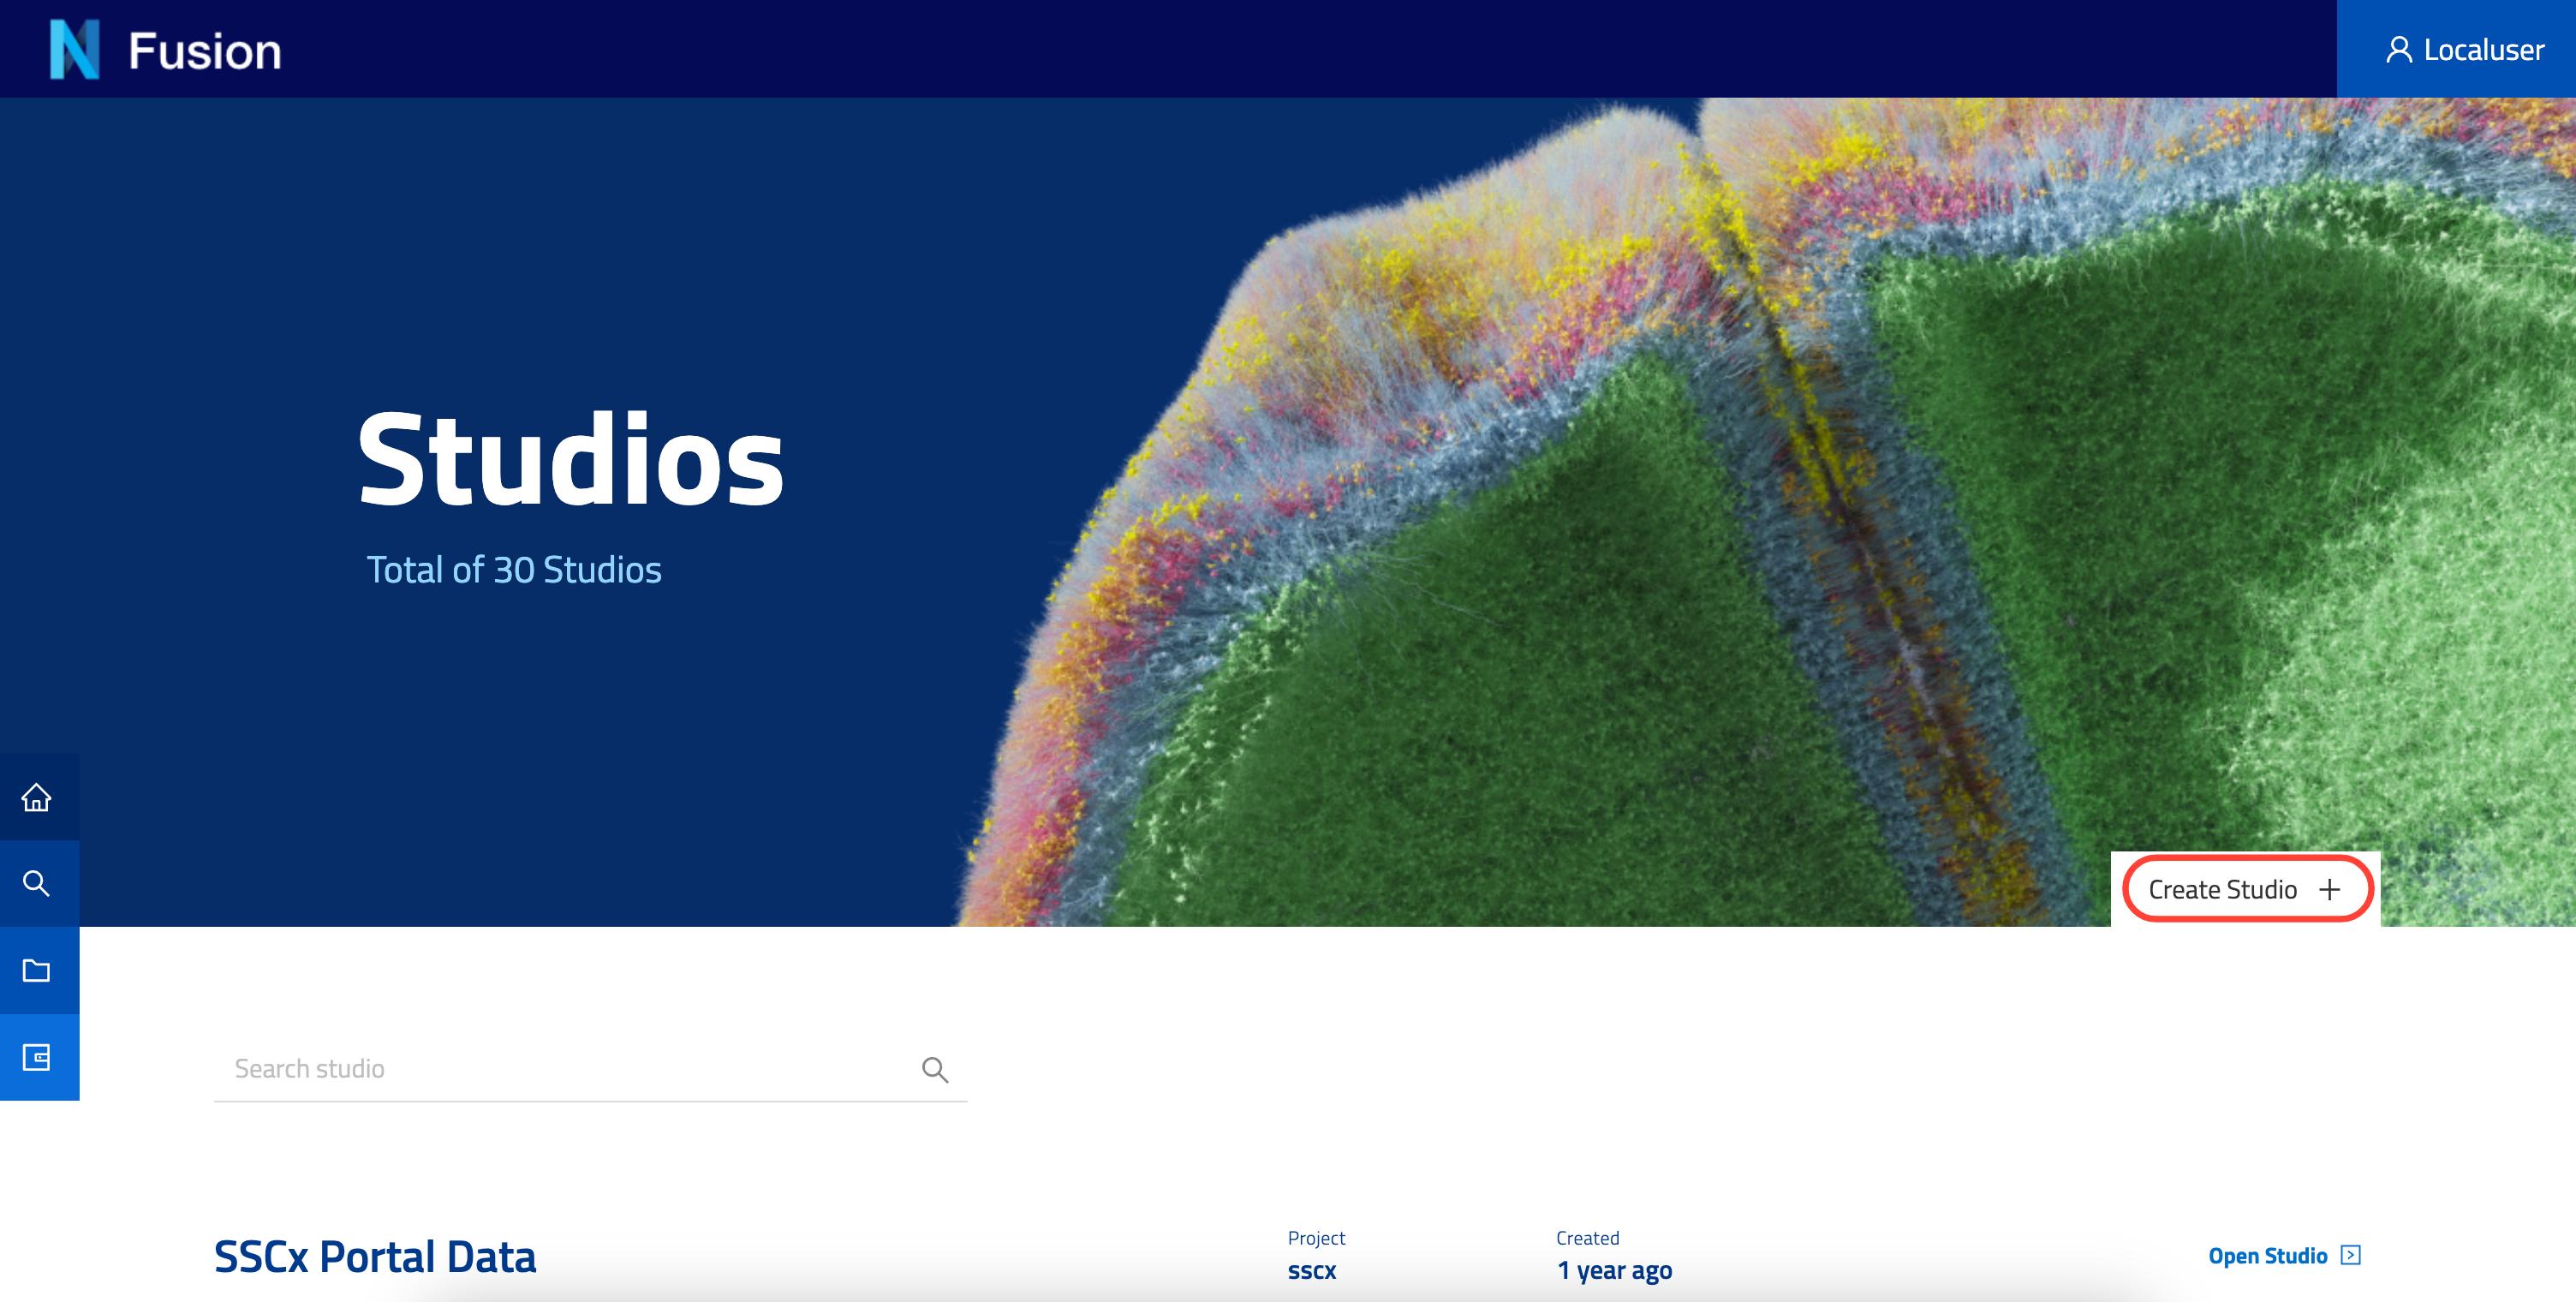
There is multiple places where the user can create a new Studio:
- Home page
- Home page > Studios List
- Home page > Projects List > Select Project > Studios Tab
Click the Create Studio button.
Fill in a form providing the following:
Label: the name of your new Studio (required field)Descriptionfor your Studio
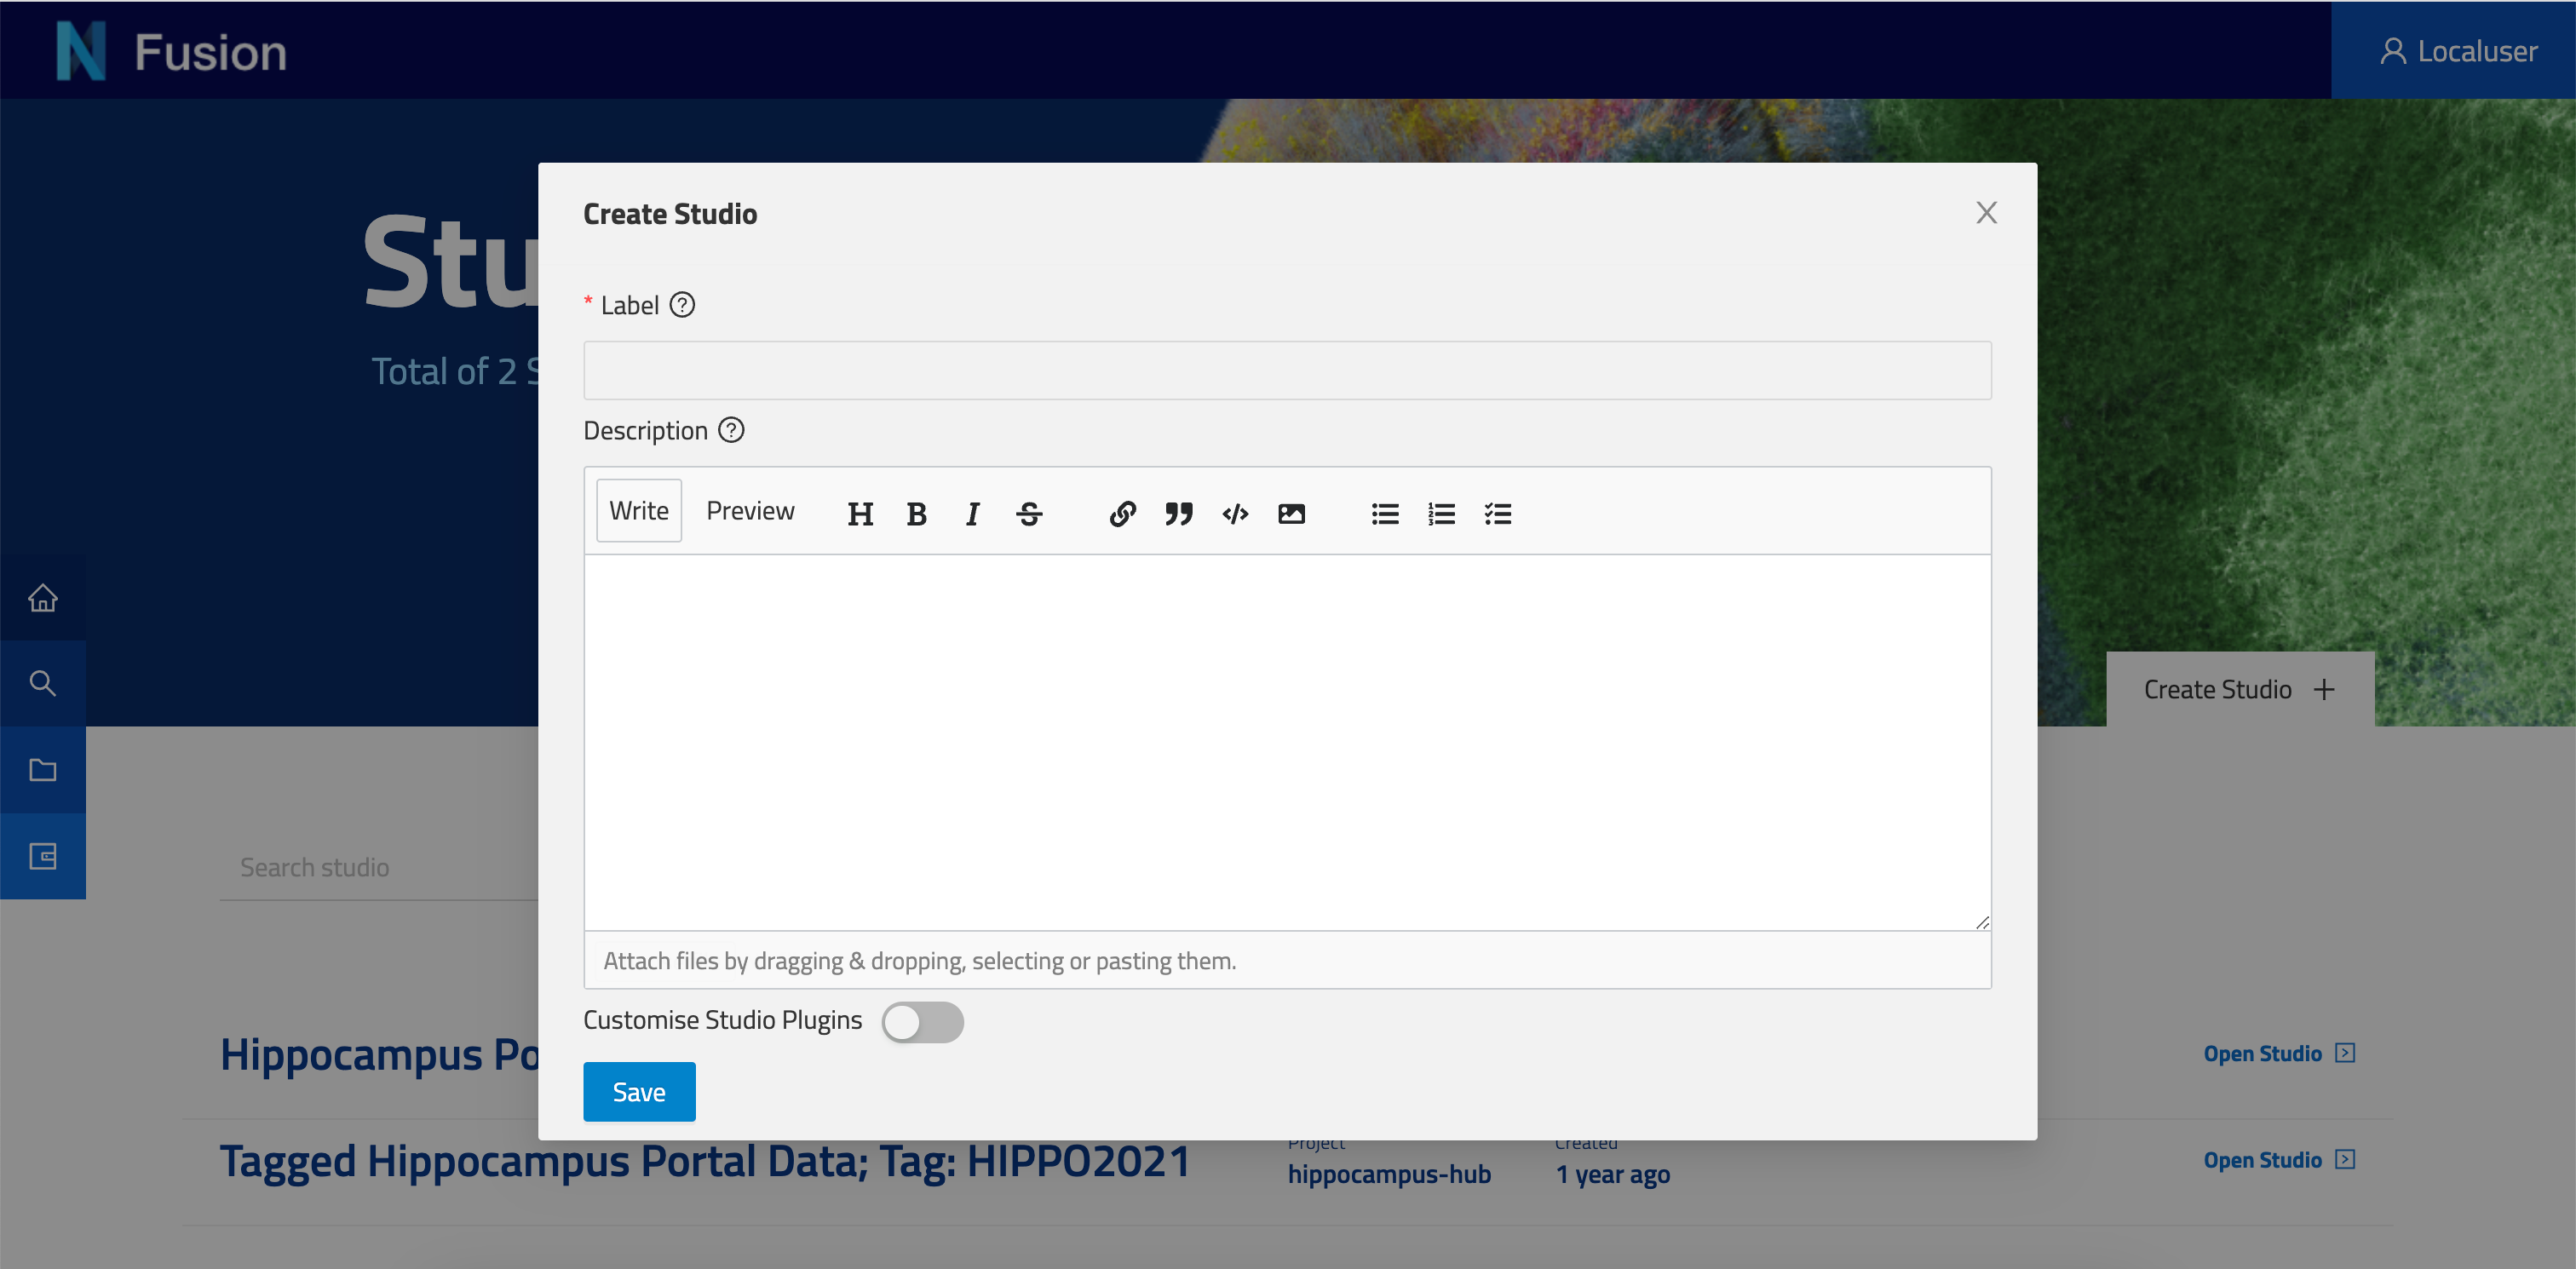
- Click
Saveand you will be navigated to the Studio View.
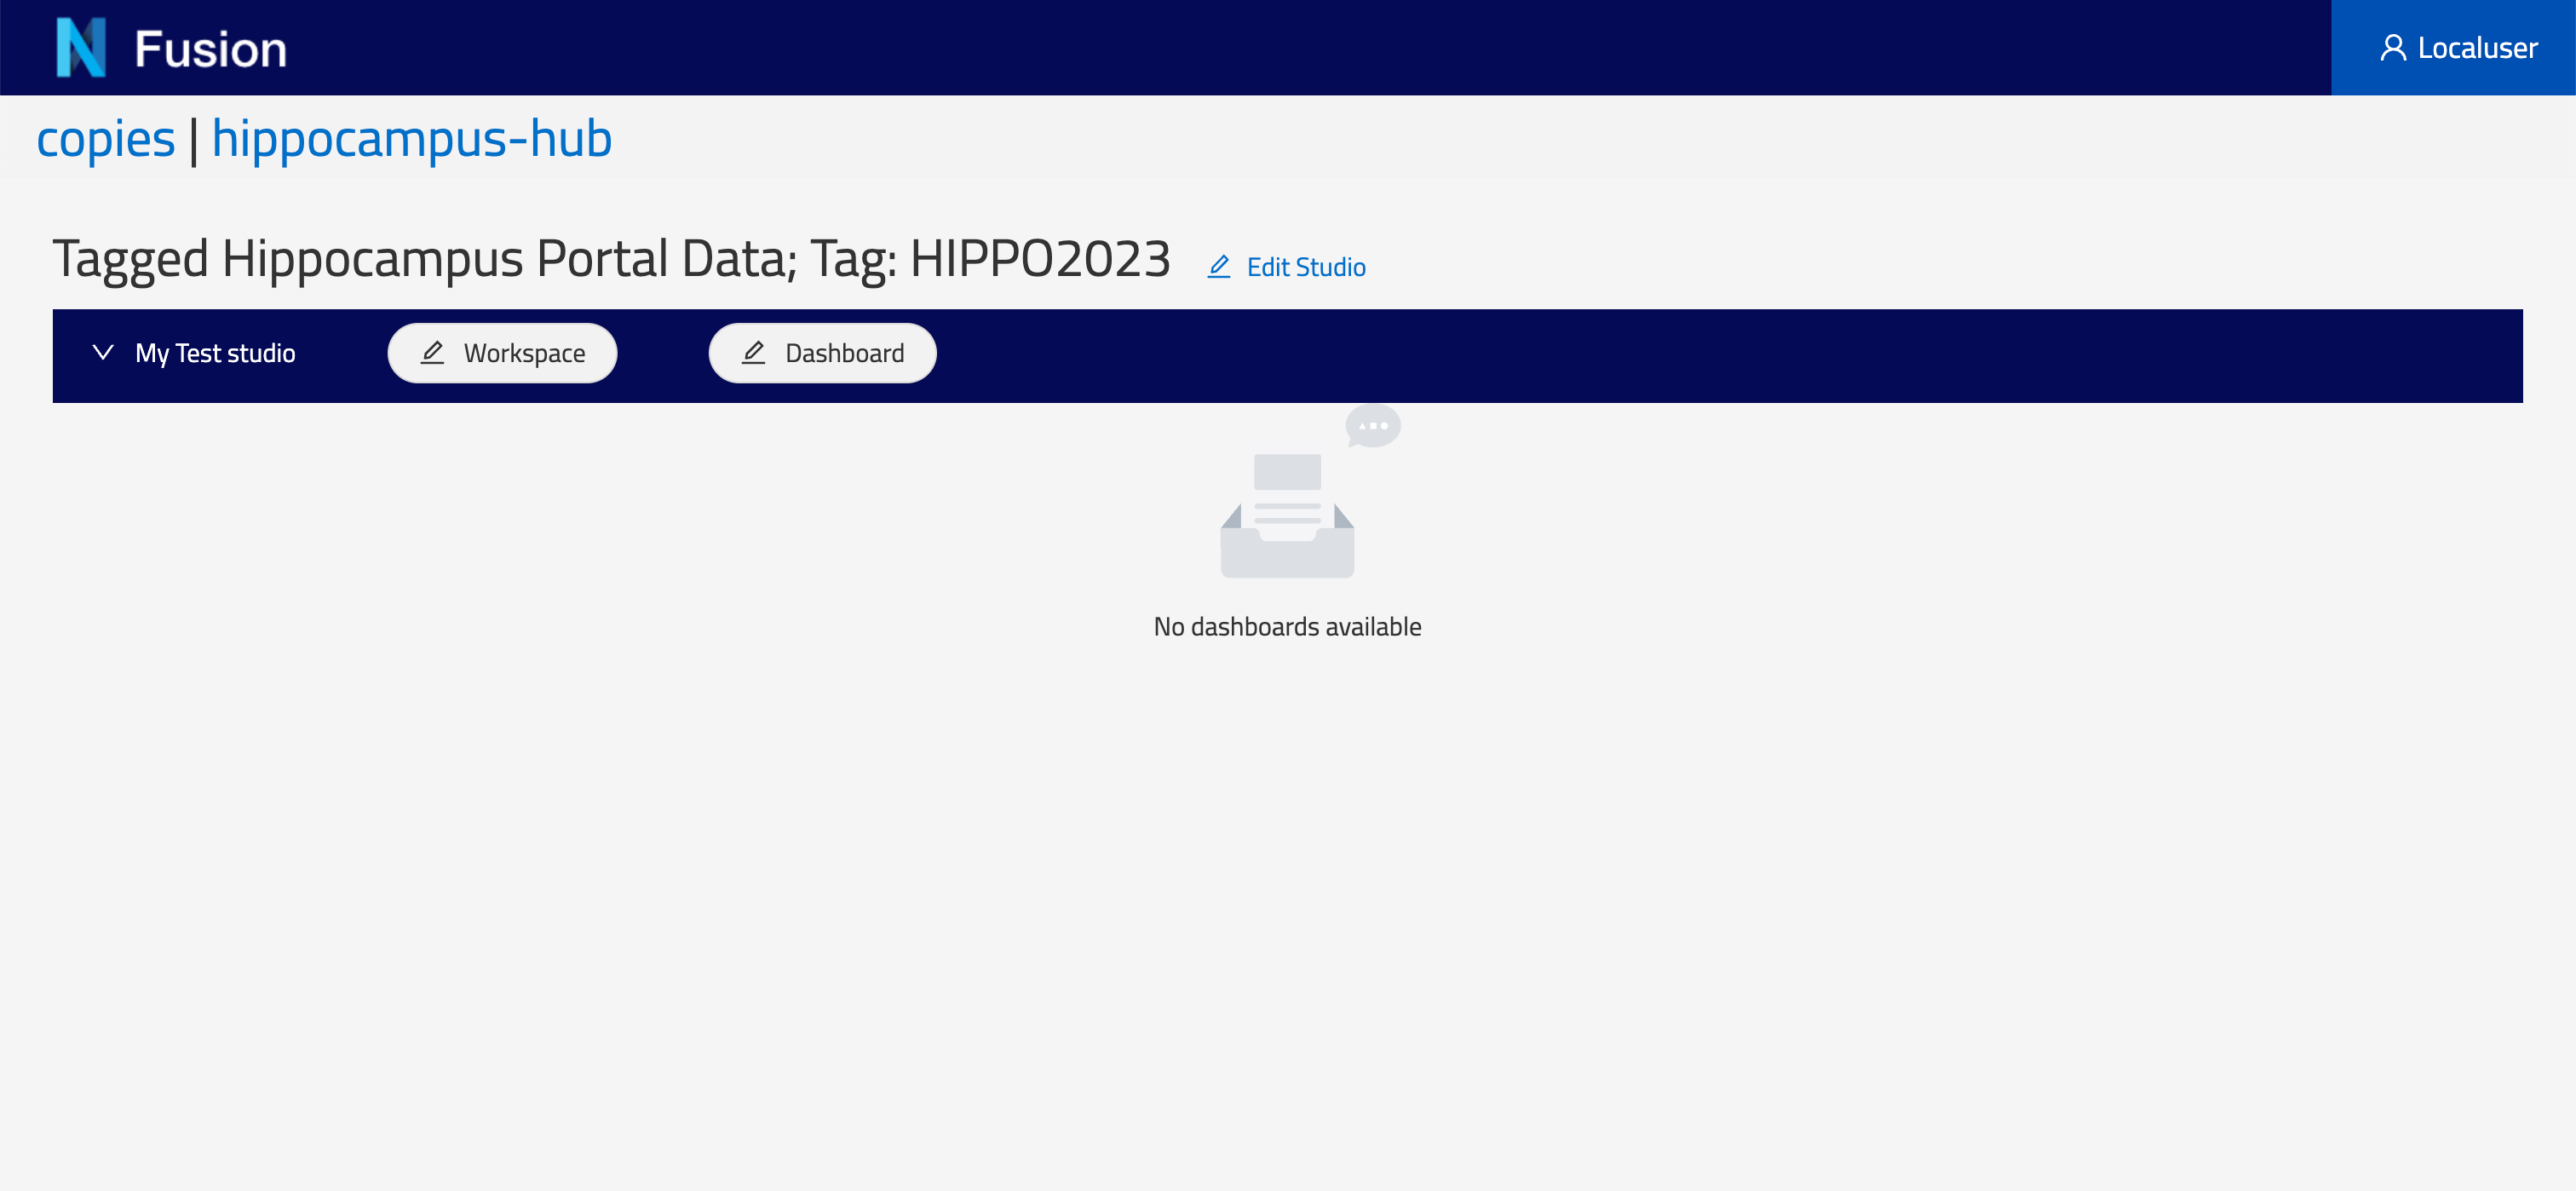
That’s it! Your new Studio is empty for now, but don’t worry! We will add Workspaces and Dashboards later.
You can also find your Studios in the Resource List (for example, filter by type Studio, or Search by id) and view it in the Resource View.
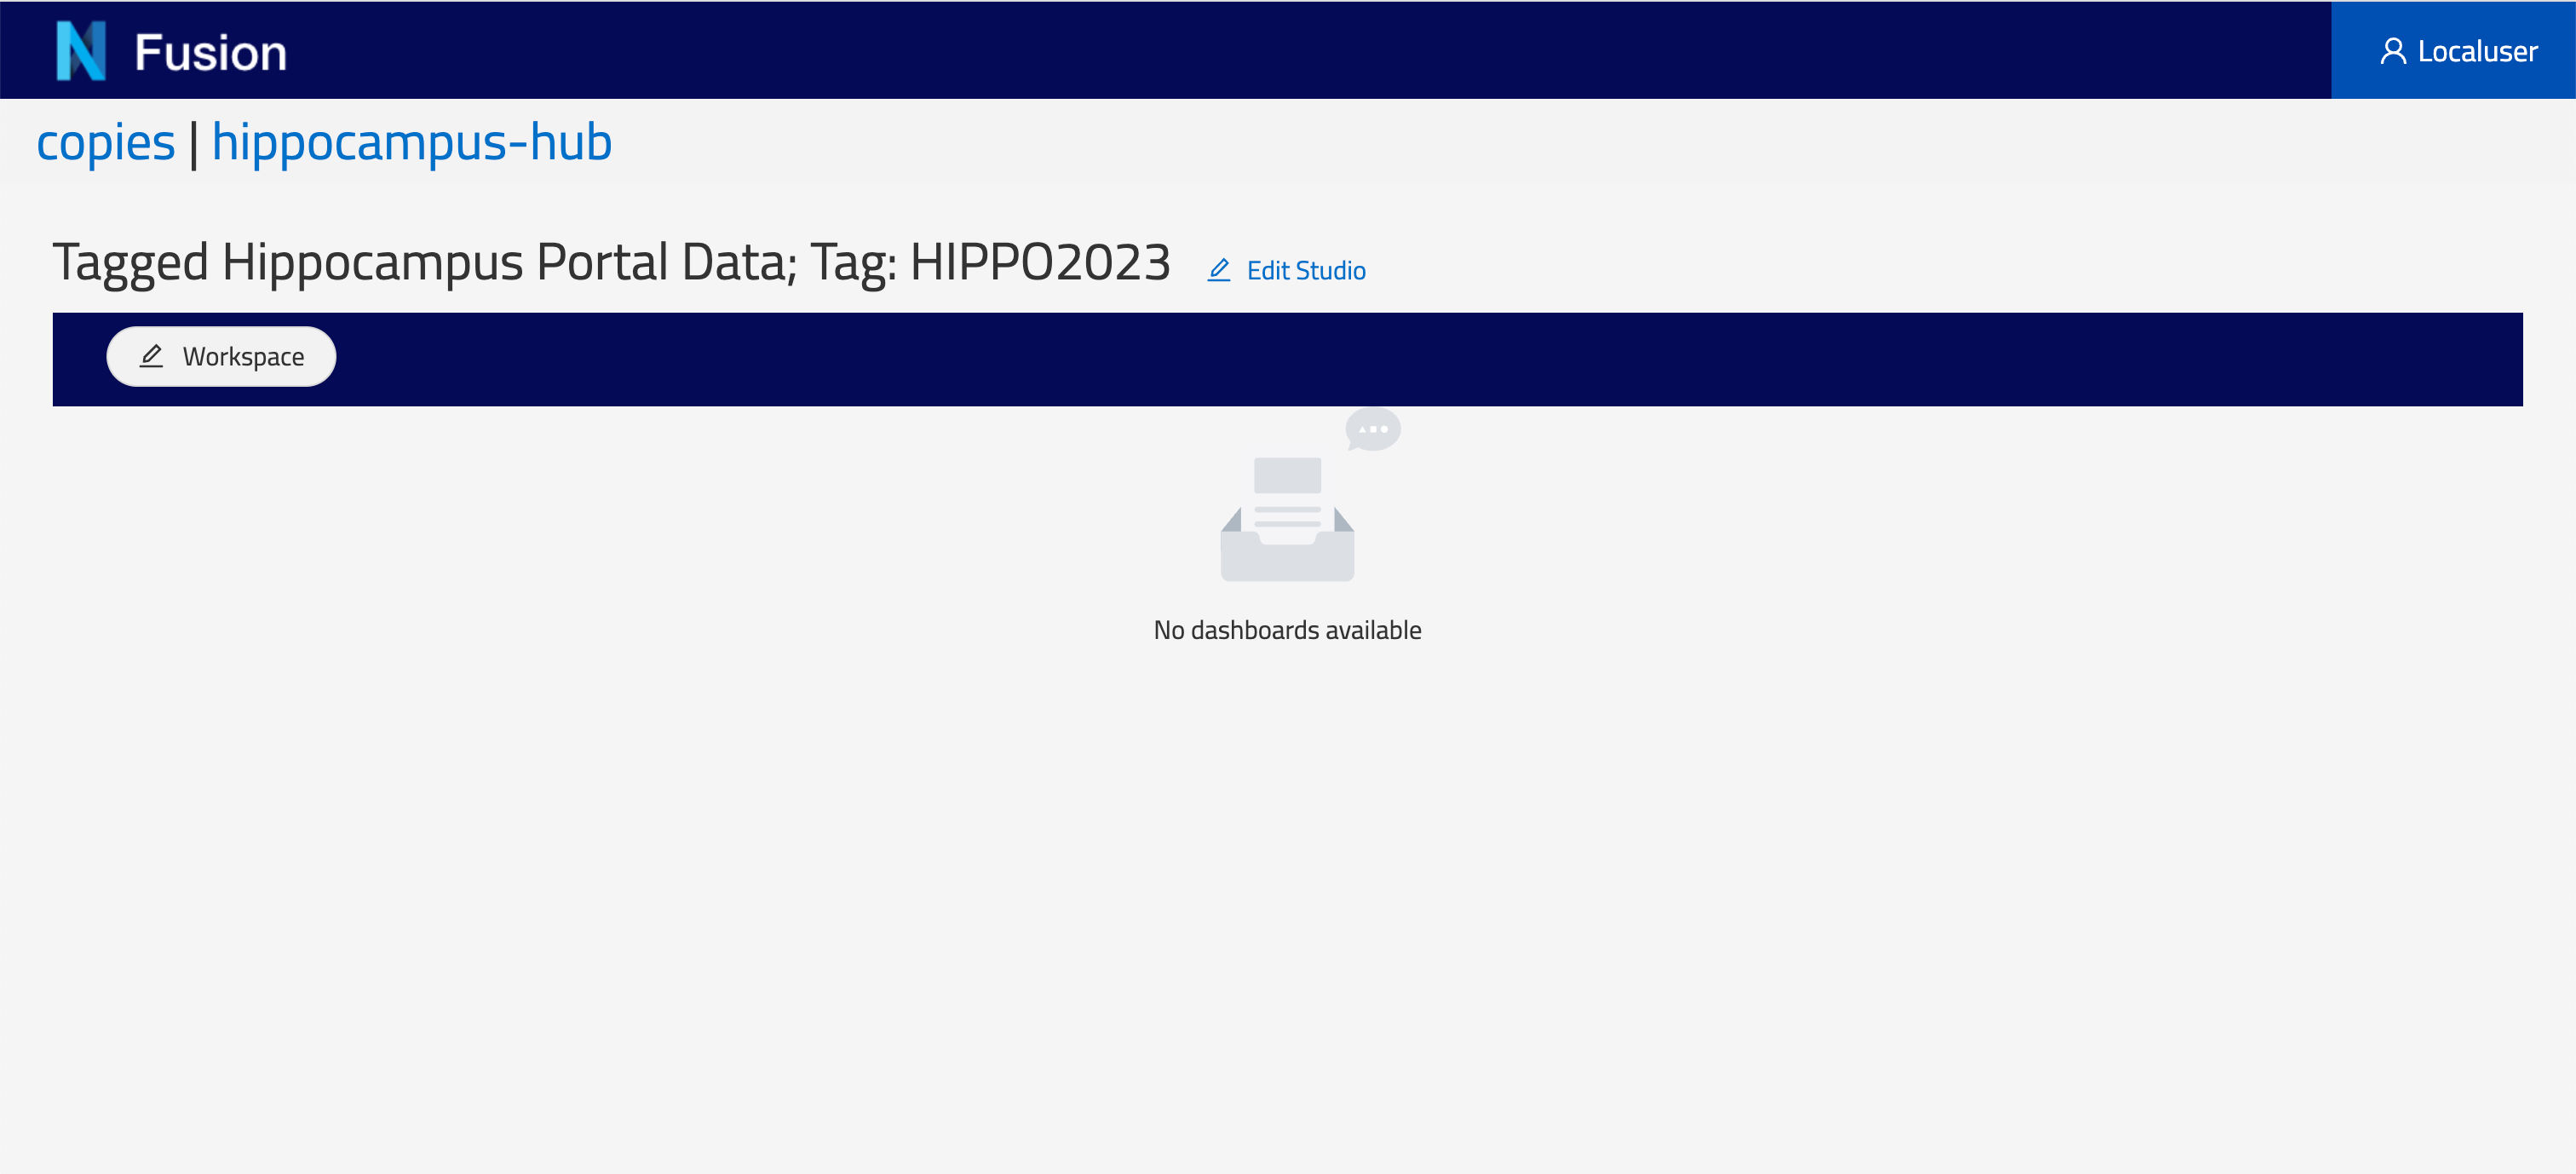
Updating a Studio
Once created, the label and the description of a Studio can be changed. Just click Edit Studio button and update the Label and the Description fields.
Removing a Studio
To remove an unwanted Studio, deprecate it in the Resource View of your project in the Project space.
Workspace Creation
Inside any Studio, click the Workspace button followed by Add to add a new workspace.
Fill in a form providing the following:
Label: the name of your newWorkspace(required field)Descriptionfor yourWorkspace
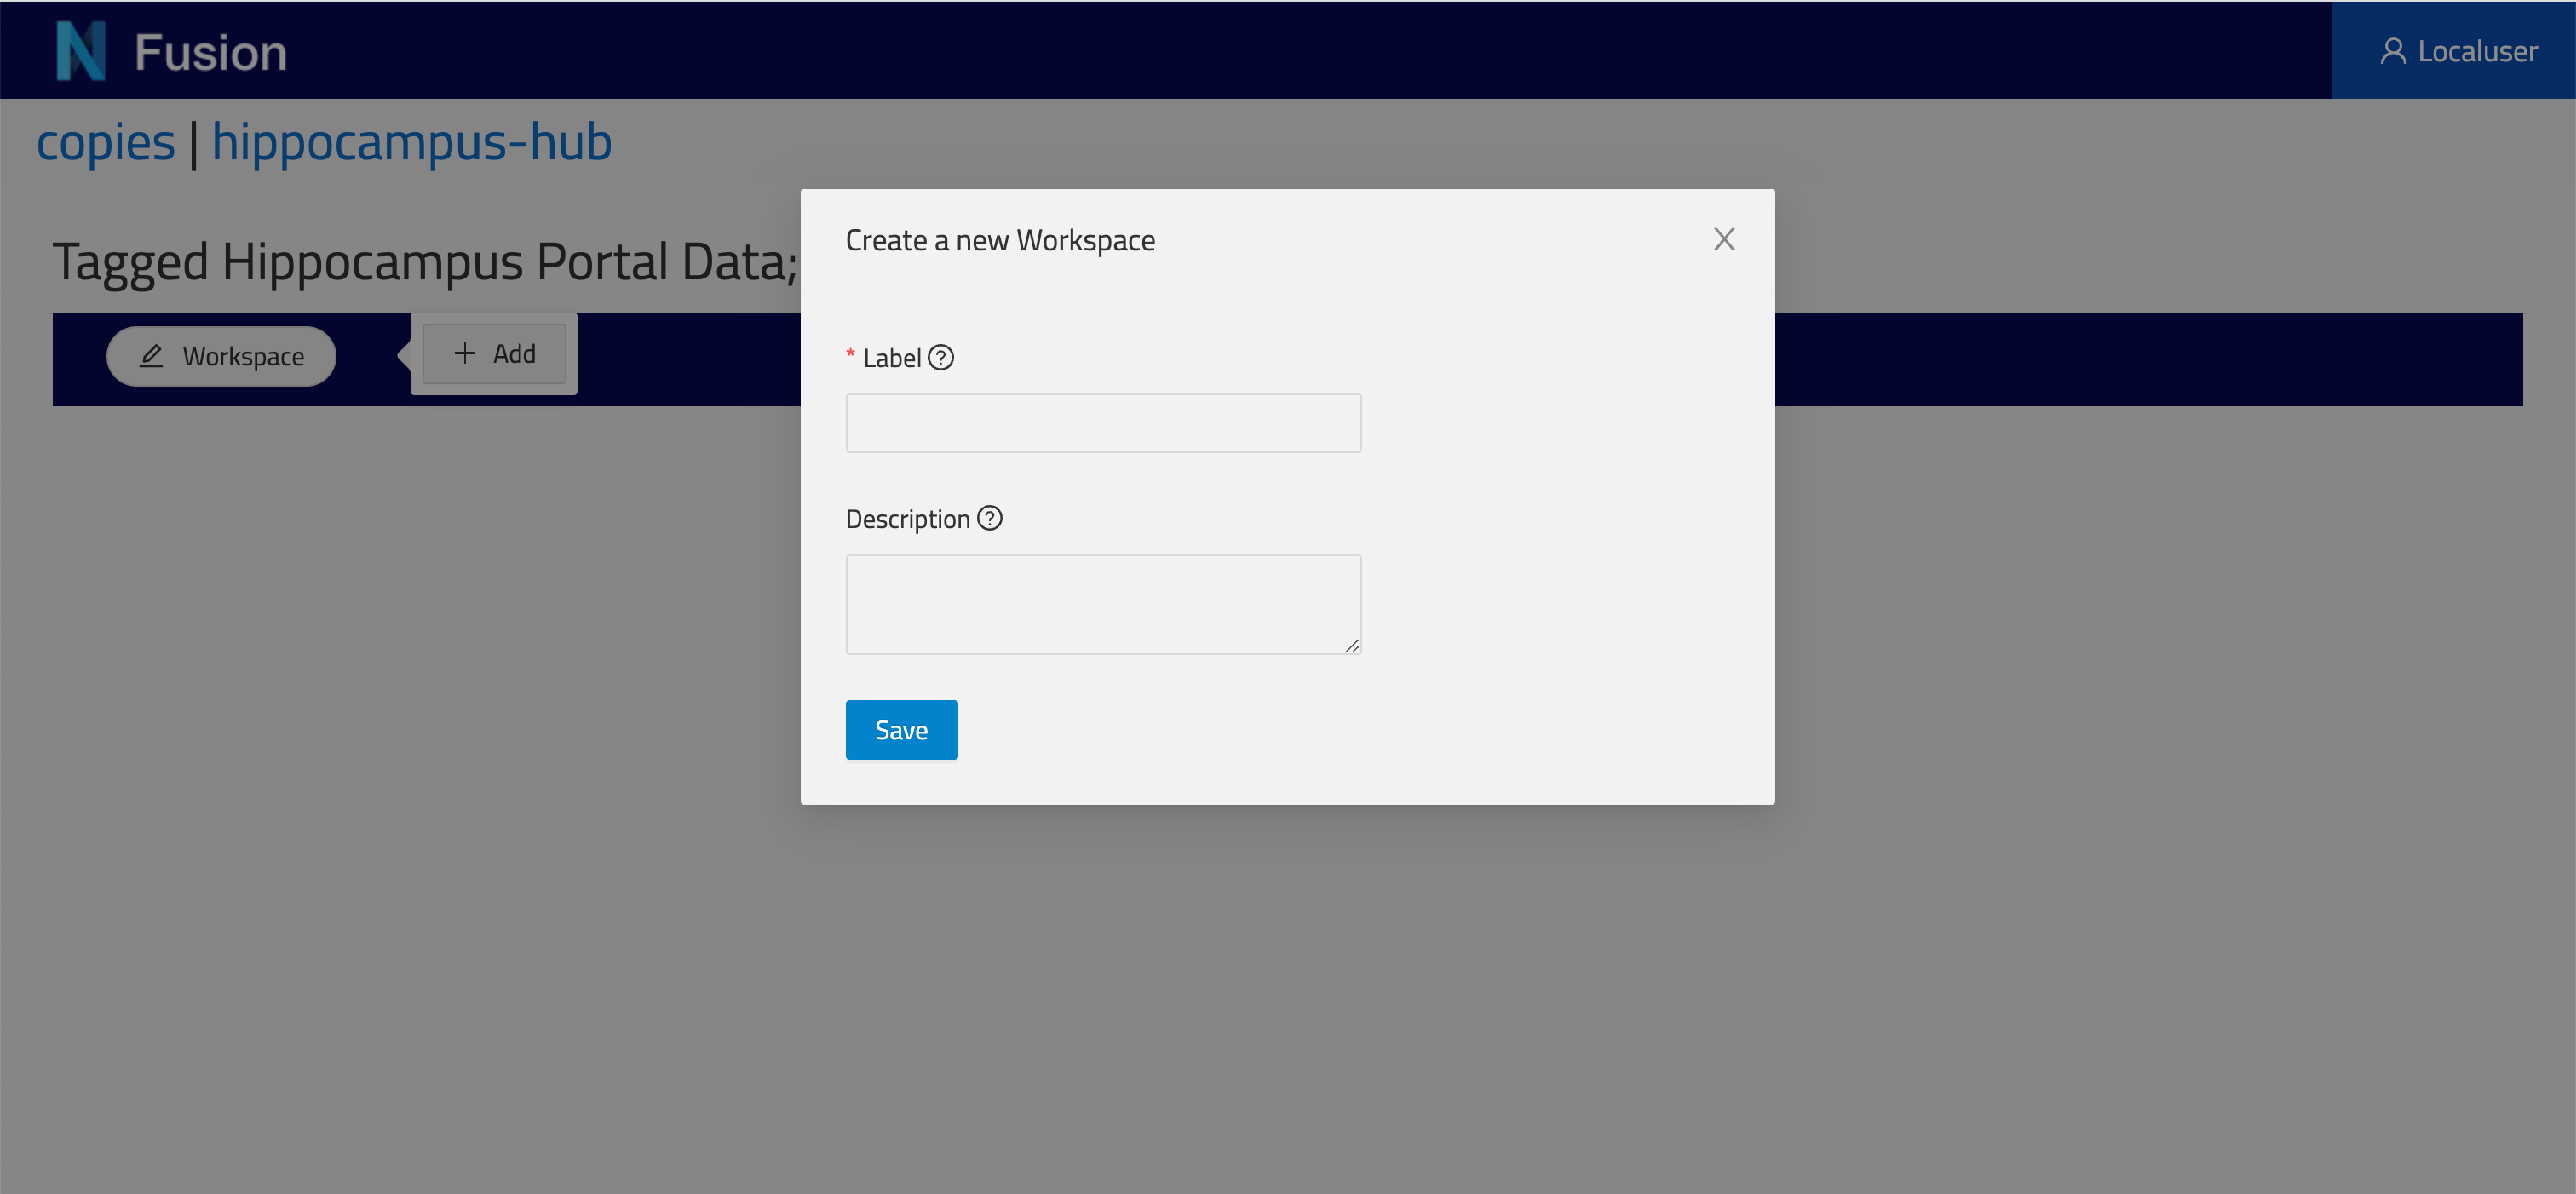
Click Save and you will be navigated to the new workspace section of your Studio View, which is given a navigable URI.
Your Workspace is created, but it will need to have at least one Dashboard/View association for anything to show there.
You can also find your Workspaces as raw JSON configurations in the Resource list (for example, filter by type StudioWorkspace, or search by id) and view it in the Resource View.
Updating a Workspace
Inside any Studio, with the desired Workspace selected from the menu, click on Workspace, then the Edit button. Then you’ll be provided with a dialog where you can review and edit the Workspace configuration.
Add or Remove Dashboards: Add or remove aDashboardto the collection in yourWorkspaceconfiguration. TheDashboardslisted are all the available non-deprecated ones in the project.Label: the name of your newWorkspace(required field).Descriptionfor yourWorkspace.
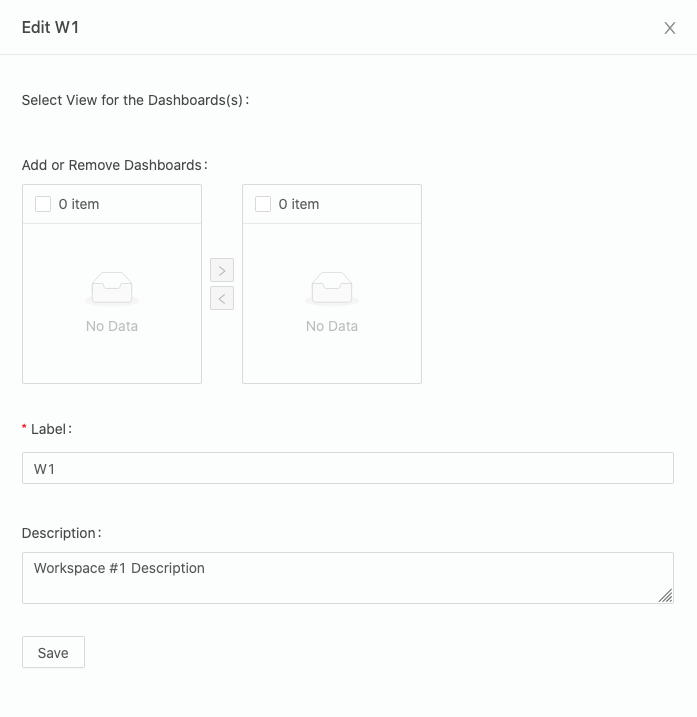
After your forms have been edited, simple click Save to submit your changes.
Removing a Workspace
You can remove a Workspace by navigating to the workspace and then clicking the Workspace button followed by Remove. Click OK in the dialog to confirm removal.
Dashboard Creation
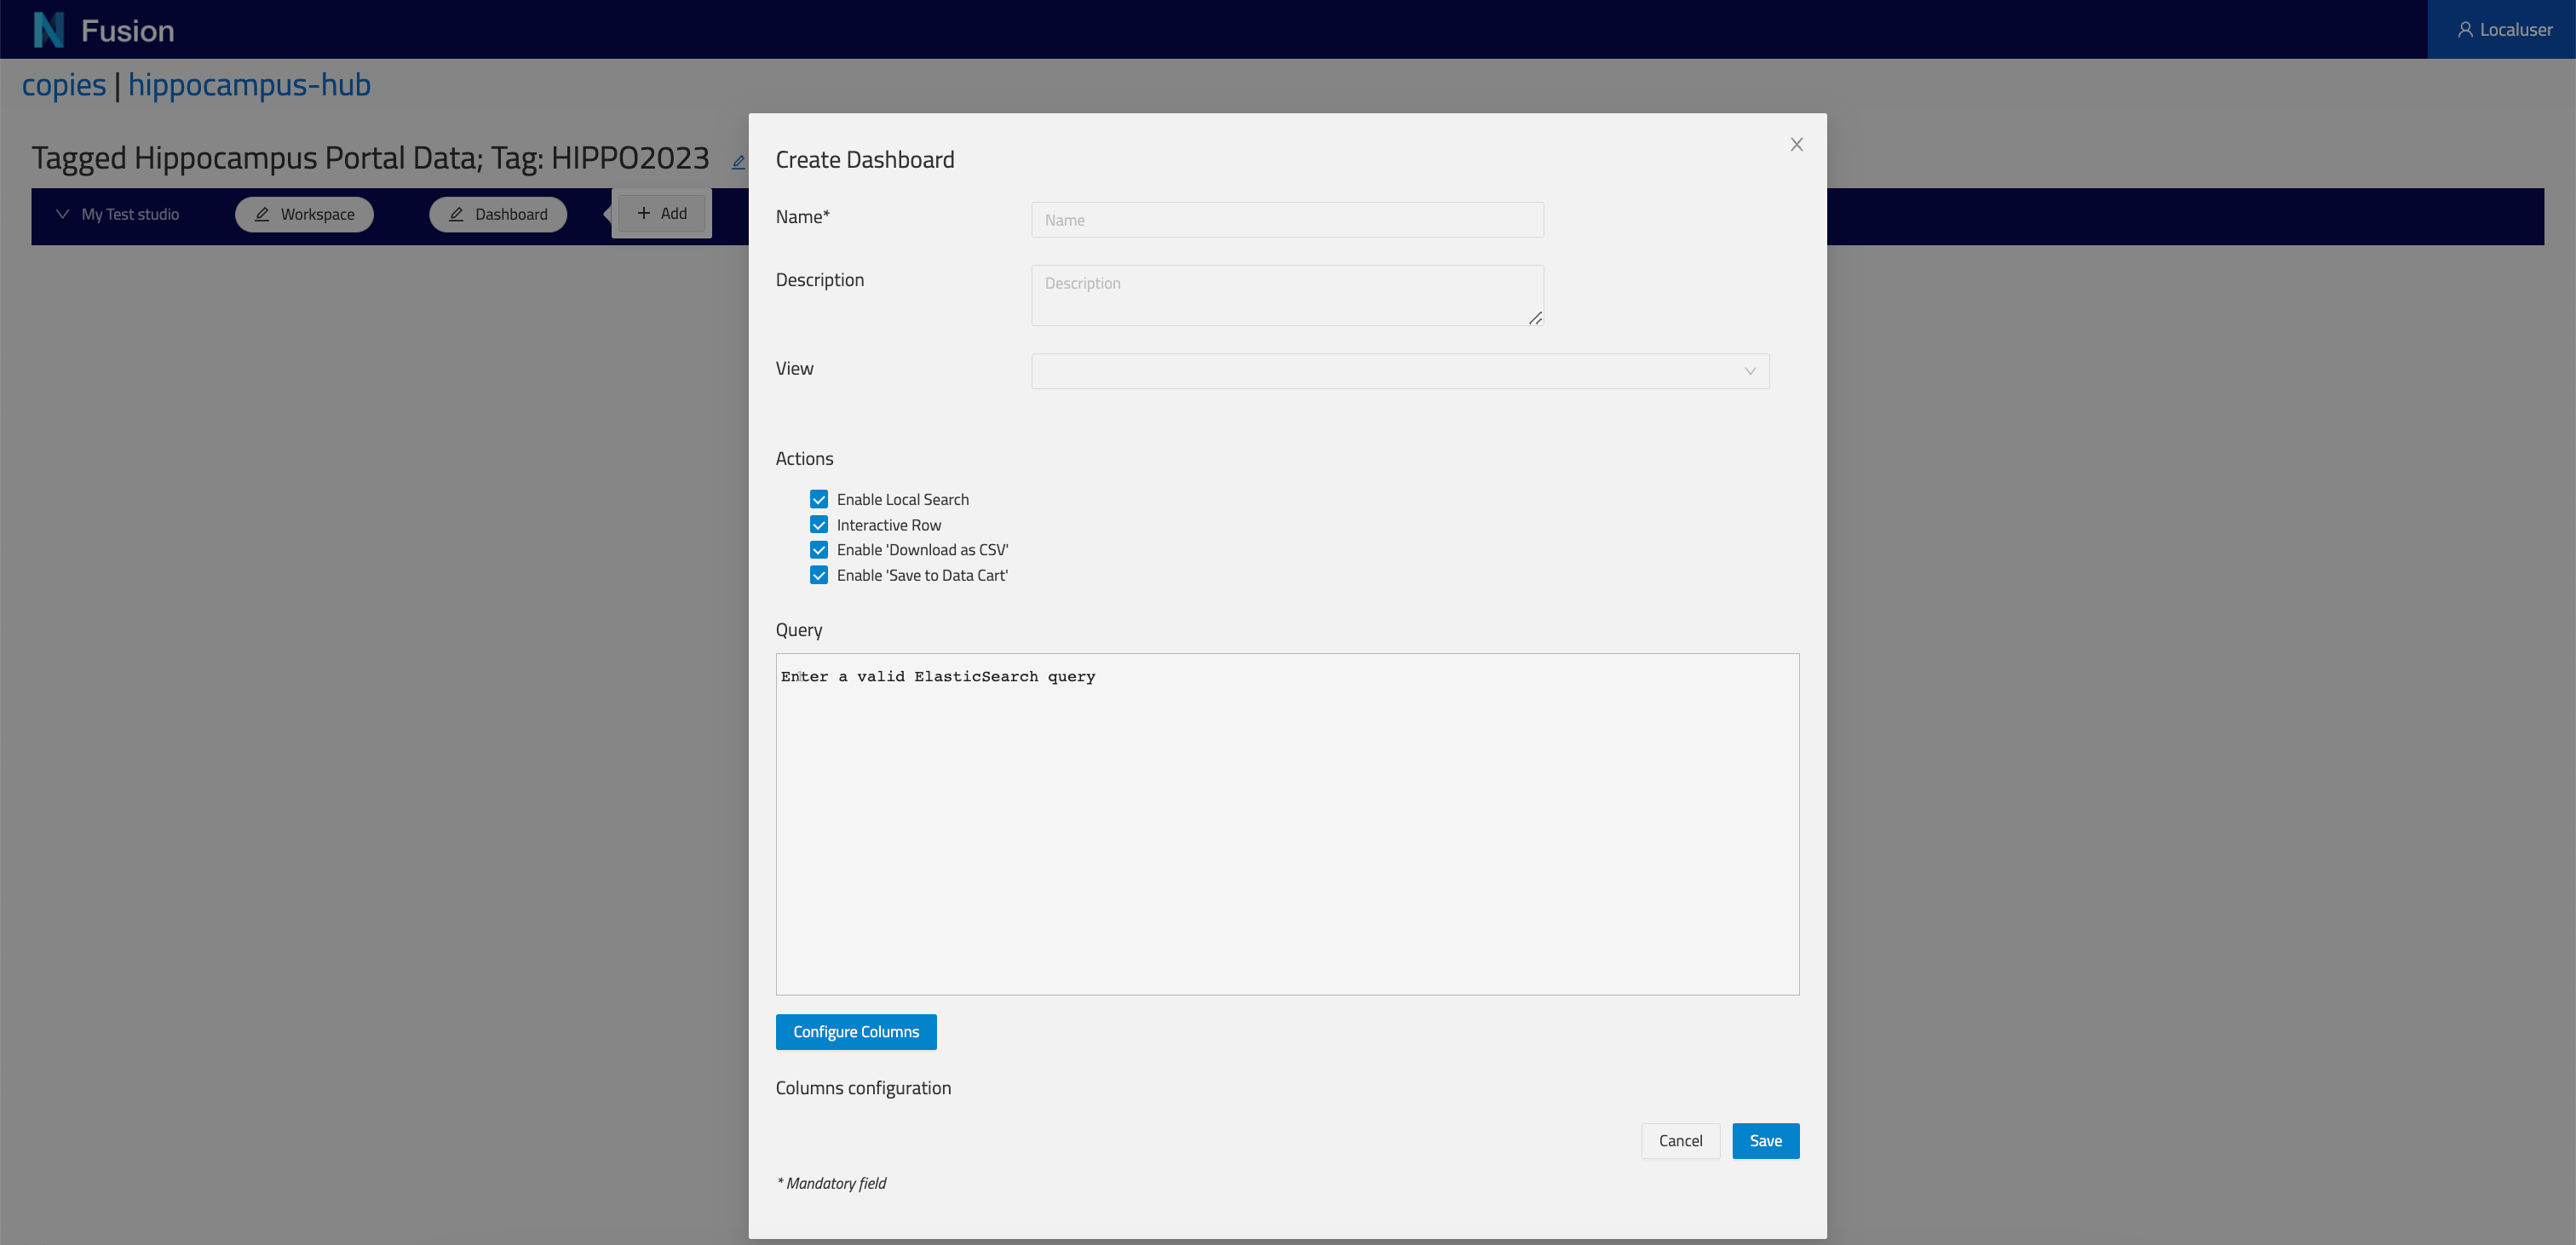
Inside any Studio View, under a selected Workspace, click the Dashboard button followed by Add.
Fill in the Create Dashboard form providing the following:
Name: the name of your newDashboard(required field)Description: an optional description for yourDashboardView: specify the view in the project that the dashboard should use as its data source. The view can be of any of the supported Nexus view types including be Sparql, ElasticSearch, and CompositeView. When specifying a composite view, you will also specify whether to query all projections or a specific projection.Query: a valid query must also be specified: a SPARQL query for SPARQL views (a SPARQL query that conforms to thedataQueryfield in the configuration) or an ElasticSearch query for ElasticSearch views.
Sparql Dashboards
You can click on the
View query in Sparql Editorto open theSparql Editorin a new tab to work on your query while querying it against aSparql Viewin your project, so you can make sure it works and provides the fields you want. Then, you can copy and past that back in the form.To understand more about the SPARQL queries requirements, check below.
Click Save and the Dashboard and its query results should show up!
You can now also add this Dashboard to other Workspaces across the project.
Elasticsearch Dashboard
In the create dashboard form, you can select a ElasticSearch view from the view dropdown. And then use an ElasticSearch query targeting that view to populate your dashboard. It will work same as the SPARQL dashboard, except for the query and the view.
Updating a Dashboard
You’ll find the edit Dashboard under the dashboard label. After your form has been edited, simple click Save to submit your changes.
Removing a Dashboard
You can remove a Dashboard by deprecating it from the Resource View.
Sparql Query Requirements
The ?self variable
In order for the UI to function as intended, you must provide a unique ID variable inside your SPARQL statement, labeled as ?self. This will be used to generate the table and fetch resources when navigating to the Resource Panel of a row item. Ideally, this ?self variable should correspond with the _self of a target Resource of which to center your query against as a subject. The ?self variable will never be shown in the table, so you need some other variable in addition to view the results properly, or you’ll end up with a table without any rows.
Making queries visible
In addition to the ?self variable, you need to have at minimum one other variable defined, which will be displayed on each row. The variable name will label the header of the table column, capitalized.
The minimum functioning query with the ?self variable defined
# This is the minimum functioning query for Studio
prefix nxv: <https://bluebrain.github.io/nexus/vocabulary/>
SELECT DISTINCT ?subject ?self
WHERE {
   ?subject nxv:self ?self ;
}
LIMIT 20
Example SPARQL Queries
Here’s an example of fetching unique Persons using https://schema.org properties.
prefix nxv: <https://bluebrain.github.io/nexus/vocabulary/>
prefix s: <http://schema.org/>
SELECT DISTINCT ?self ?familyName ?givenName
WHERE {
  ?s nxv:constrainedBy <https://neuroshapes.org/dash/person> ;
  nxv:self ?self ;
  s:familyName ?familyName ;
  s:givenName ?givenName
}
LIMIT 20
Studio Description
Every Studio deserves a beautiful description to highlight its data. We’ve included a Description Viewer above the tables so that users can write flavored markdown to give their studios a paragraph of context or show off some images. Edit the description in either the Project resource editor, or using the edit Studio button located besides the Studio title
The description can be rendered using handlebars and markdown, in the same way described in the Project Resource Viewer